Sunday, June 17, 2012

Add Sinhala Fonts to Android Application

Now I'm going to tell how add sinhala fonts to an android application. So we need sinhala fonts TTF files.
This techniques can be used for other language also, so basically what do we need is any language TTF files.
Firstly, create an android project, my sample project is named as 'LanguageApp'
Then you can add any sinhala TTF file to the assets directory in the project(copy and paste).
I'm going to create a sample Sinhala to English converter using button event. So I have create main.xml file using two edit text filed and a button.
<?xml version="1.0" encoding="utf-8"?>
<LinearLayout xmlns:android="http://schemas.android.com/apk/res/android"
    android:orientation="vertical"
    android:layout_width="fill_parent"
    android:layout_height="fill_parent"
    android:weightSum="1">
    <LinearLayout android:layout_width="match_parent" android:id="@+id/linearLayout1" android:orientation="vertical" android:layout_height="wrap_content">
        <EditText android:layout_height="wrap_content" android:id="@+id/editText1" android:layout_width="match_parent">
            <requestFocus></requestFocus>
        </EditText>
    </LinearLayout>
    <Button android:text="Tnkak" android:layout_height="wrap_content" android:id="@+id/button1" android:layout_width="104dp"></Button>
    <EditText android:layout_height="wrap_content" android:id="@+id/editText2" android:layout_width="match_parent"></EditText>
</LinearLayout>
In this button, I have given like android:text="Tnkak", What I do is, this English letters are related to Sinhala ඔබන්න(Click) word.

This is my LanguageAppActivity class

package com.languageapp;
import android.app.Activity;
import android.graphics.Typeface;
import android.os.Bundle;
import android.view.View;
import android.view.View.OnClickListener;
import android.widget.Button;
import android.widget.EditText;
public class LanguageAppActivity extends Activity implements OnClickListener {
/** Called when the activity is first created. */ 
    @Override
    public void onCreate(Bundle savedInstanceState) {
    super.onCreate(savedInstanceState);
        setContentView(R.layout.main);
        Button myButton=(Button)findViewById(R.id.button1);
        Typeface type=Typeface.createFromAsset(getAssets(), "ARADANA.TTF");
        myButton.setTypeface(type);
        myButton.setOnClickListener(this);
    }
    @Override
    public void onClick(View v) {
    // TODO Auto-generated method stub
    Typeface tf = Typeface.createFromAsset(getAssets(),"ARADANA.TTF");
    EditText et=(EditText)findViewById(R.id.editText2);
    et.setTypeface(tf);
    EditText editText=(EditText)findViewById(R.id.editText1);
    et.setText(editText.getText());
    } 
}
I have highlighted to show that how I change font to Sinhala.
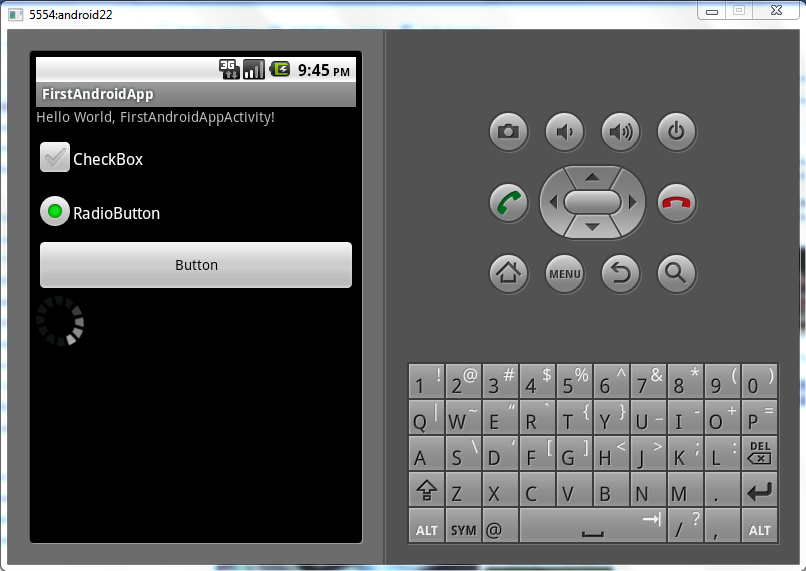
After run the application we can see like this output and give some English words to edit text and click the button. You can see convert English fonts related to those Sinhala fonts.
I have uploaded sample project, 
LanguageApp.zip

Saturday, June 16, 2012

Android Button Event

In my previous post, I have mentioned that how create an android project. So I directly give instructions after creating the project part.
My project name is 'ButtonEventApp', In this project I have two java class in src and two xml file in layout.
Therefore you need to create java class named  ButtonEventAppActivity.
  Select ButtonEventApp in Package Explorer and right click the package then -> New -> Class
Name : ButtonEventActivity2

Then create a xml file in layout folder
  Select ButtonEventApp in Package Explorer and right click the layout then -> New -> Android XML File
File : main2

This is my ButtonEventAppActivity.java class
package com.buttonevent;
import android.app.Activity;
import android.content.Intent;
import android.os.Bundle;
import android.view.View;
import android.widget.Button;
public class ButtonEventAppActivity extends Activity {
/** Called when the activity is first created. */
    @Override
    public void onCreate(Bundle savedInstanceState) {
        super.onCreate(savedInstanceState);
        setContentView(R.layout.main);
        Button next = (Button) findViewById(R.id.button1);
        next.setOnClickListener(new View.OnClickListener() {
            public void onClick(View view) {
                Intent myIntent = new Intent(view.getContext(), ButtonEventActivity2.class);
                startActivityForResult(myIntent, 0);
            }
        });
    }
}


This is my ButtonEventAppActivity2.java class
package com.buttonevent;
import android.app.Activity;
import android.content.Intent;
import android.os.Bundle;
import android.view.View;
import android.widget.Button;
public class ButtonEventActivity2 extends Activity{
/** Called when the activity is first created. */
    public void onCreate(Bundle savedInstanceState) {
        super.onCreate(savedInstanceState);
        setContentView(R.layout.main2);
        Button next = (Button) findViewById(R.id.button2);
        next.setOnClickListener(new View.OnClickListener() {
            public void onClick(View view) {
                Intent intent = new Intent();
                setResult(RESULT_OK, intent);
                finish();
            }
        });
    }
}

This is my main,xml file
I have added a text view and a button, By double clicking on them, we can edit their variables
<?xml version="1.0" encoding="utf-8"?>
<LinearLayout xmlns:android="http://schemas.android.com/apk/res/android"
    android:orientation="vertical"
    android:layout_width="fill_parent"
    android:layout_height="fill_parent"
    android:weightSum="1">
    <TextView android:layout_height="wrap_content" android:text="Page 1" android:id="@+id/textView1" android:layout_width="match_parent" android:layout_weight="0.05"></TextView>
    <Button android:text="Go Next Page" android:layout_height="wrap_content" android:id="@+id/button1" android:layout_width="match_parent" android:layout_weight="0.05"></Button>
</LinearLayout>

This is my main2.xml file
<?xml version="1.0" encoding="utf-8"?>
<LinearLayout
  xmlns:android="http://schemas.android.com/apk/res/android"
  android:orientation="vertical"
  android:layout_width="match_parent"
  android:layout_height="match_parent" android:weightSum="1">
    <TextView android:layout_height="wrap_content" android:text="Page 2" android:id="@+id/textView1" android:layout_width="match_parent" android:layout_weight="0.06"></TextView>
    <Button android:text="Go Previous Page" android:layout_height="wrap_content" android:id="@+id/button2" android:layout_weight="0.06" android:layout_width="match_parent"></Button>
    
</LinearLayout>

After that We have to add activity for the AndroidManifest.xml file
<?xml version="1.0" encoding="utf-8"?>
<manifest xmlns:android="http://schemas.android.com/apk/res/android"
      package="com.buttonevent"
      android:versionCode="1"
      android:versionName="1.0">
    <uses-sdk android:minSdkVersion="8" />

    <application android:icon="@drawable/icon" android:label="@string/app_name">
        <activity android:name=".ButtonEventAppActivity"
                  android:label="@string/app_name">
            <intent-filter>
                <action android:name="android.intent.action.MAIN" />
                <category android:name="android.intent.category.LAUNCHER" />
            </intent-filter>
        </activity>
<activity android:name=".ButtonEventActivity2"></activity> 
    </application>
</manifest>

You can download source file of the project.

First Android Application

First you have to create an android project using eclipse.
   File -> New -> Android Project, 
Then you can see 'New Android Project' window.

It consists of some fields, like Project Name, Build Target, Properties and Working Sets.
In my sample application,
Project Name   : FirstAndroidApp
Build Target      : Android 2.2
Package Name : com.firstandroidapp
(Do not need to edit auto filling fields)

Then you can see project is in the Project Explorer (left hand side of the eclipse).
Then explorer FirstAndroidApp -> src -> com.firstandroidapp and open FirstAndroidAppActivity class
Now you can see the code of that class.


Then explorer  res -> layout and open main.xml
Now you can see Graphical Layout and main.xml below and Form Widget on the left side.
You can add any widget and save the main.xml file
After that you can build the project
  Select project in Package Explorer right click on it and select Build Project 
After build the project, right click on the project Run As -> Android Application


Then you can see pop up the emulator and run the application.

You can download source code of the FirstAndroiApp and then import into the workspace. FirstAndroidApp.zip

Friday, May 18, 2012

Create and Run Android Virtual Device (AVD)

Now I am going to tell how create and run a android virtual device (AVD).
  • open the AVD Manager via Windows → AVD Manager and press New.

  • Enter Details as you wish for AVD window
We can also select the box Enabled for Snapshots. This will make the second start of the virtual device much faster.
At the end press the button Create AVD. This will create the AVD configuration and display it under the Virtual devices.
To test if your setup is correct, select your device and press Start.
After (a long time) your AVD starts. You are able to use it via the mouse and via the virtual keyboard of the emulator.


How Install Android for Eclipse

I'm going to tell how install android plugin for Eclipse. To do that we need some pre-requisties.
1. Eclipse - http://www.eclipse.org/downloads/
2. Android SDK - http://developer.android.com/sdk/index.html

After downloading those as your wish, then start eclipse and do step by step as follows,

  • select Help > Software Updates > Find and Install….
  • In the dialog that appears, select Search for new features to install and press Next.
  • Press New Remote Site.
  • In the resulting dialog box, enter a name for the remote site (e.g. Android Plugin) and enter this as its URL: https://dl-ssl.google.com/android/eclipse/ or  http://dl-ssl.google.com/android/eclipse/.
  • Press OK.
  • You should now see the new site added to the search list (and checked).
  • Press Finish.
  • In the subsequent Search Results dialog box, select the checkbox for Android Plugin > Eclipse Integration > Android Development Tools and press Next.
  • Read the license agreement and then select Accept terms of the license agreement, if appropriate.
  • Press Next.
  • Press Finish.
  • The ADT plugin is not signed; you can accept the installation anyway by pressing Install All.
  • Restart Eclipse.After restart, update your Eclipse preferences to point to the SDK root directory ($SDK_ROOT): Select Window > Preferences… to open the Preferences panel. Select Android from the left panel.  For the SDK Location in the main panel, press Browse... and find the SDK root directory.
  • Press Apply, then OK

Thursday, January 5, 2012

Android Application Architecture


Android Application Architecture

1. AndroidManifest.xml

An Android application is described in the file AndroidManifest.xml. This file must declare all Activities,ServicesBroadcastReceivers and ContentProvider of the application. It must also contain the required permissions for the application. For example if the application requires network access it must be specified here. AndroidManifest.xml can be thought as the deployment descriptor for an Android application.

The package attribute defines the base package for the following Java elements. It also must be unique as the Android Marketplace only allows application for a specific package once. Therefore a good habit is to use your reverse domain name as a package to avoid collisions with other developers.
android:versionName and android:versionCode specify the version of your application. versionNameis what the user sees and can be any string. versionCode must be an integer and the Android Market uses this to determine if you provided a newer version to trigger the update on devices which have your application installed. You typically start with "1" and increase this value by one if you roll-out a new version of your application.
The tag <activity> defines an Activity, in this example pointing to the class "com.convertor". An intent filter is registered for this class which defines that this Activity is started once the application starts (action android:name="android.intent.action.MAIN"). The category definition category android:name="android.intent.category.LAUNCHER" defines that this application is added to the application directory on the Android device. The @string/app_name value refer to resource files which contain the actual values. This makes it easy to provide different resources, e.g. strings, colors, icons, for different devices and makes it easy to translate applications.
The "uses-sdk" part of the "AndroidManifest.xml" defines the minimal SDK version for which your application is valid. This will prevent your application being installed on devices with older SDK versions.

2. R.java, Resources and Assets

The directory gen in an Android project contains generated values. R.java is a generated class which contains references to resources of the res folder in the project. These resources are defined in the res directory and can be values, menus, layouts, icons or pictures or animations. For example a resource can be an image or an XML file which defines strings.
If you create a new resource, the corresponding reference is automatically created in R.java. The references are static int values, the Android system provides methods to access the corresponding resource. For example to access a String with the reference id R.string.yourString use the method getString(R.string.yourString));. R.java is automatically maintained by the Eclipse development environment, manual changes are not necessary.
While the directory res contains structured values which are known to the Android platform the directory assetscan be used to store any kind of data. In Java you can access this data via the AssetsManager and the methodgetAssets().


3. Reference to resources in XML files

In your XML files, e.g. your layout files you can refer to other resources via the sign. For example if you want to refer to a color you defined as resources you can refer to it via @color/your_id or if you have defined a "hello" string as resource you can access it via @string/hello.

4. Activities and Layouts

The user interface for Activities is defined via layouts. At runtime, layouts are instances ofandroid.view.ViewGroups . The layout defines the UI elements, their properties and their arrangement.
UI elements are based on the class android.view.View ViewGroup is a subclass of the class View and a layout can contain UI components ( Views ) or other layouts ( ViewGroups ). You should not nestle ViewGroups too deeply as this has a negative impact on performance.
A layout can be defined via Java code or via XML. You typically uses Java code to generate the layout if you don't know the content until runtime; for example if your layout depends on content which you read from the Internet.
XML based layouts are defined via a resource file in the folder /res/layout . This file specifies theViewGroups Views , their relationship and their attributes for a specific layout. If a UI element needs to be accessed via Java code you have to give the UI element an unique id via the android:id attribute. To assign a new id to an UI element use @+id/yourvalue . By conversion this will create and assign a new id yourvalueto the corresponding UI element. In your Java code you can later access these UI elements via the methodfindViewById(R.id.yourvalue) .
Defining layouts via XML is usually the preferred way as this separates the programming logic from the layout definition. It also allows the definition of different layouts for different devices. You can also mix both approaches.

5. Activities and Lifecycle

The operating system controls the life cycle of your application. At any time the Android system may stop or destroy your application, e.g. because of an incoming call. The Android system defines a life cycle for activities via pre-defined methods. The most important methods are:
  • onSaveInstanceState() - called if the activity is stopped. Used to save data so that the activity can restore its states if re-started
  • onPause() - always called if the Activity ends, can be used to release resource or save data
  • onResume() - called if the Activity is re-started, can be used to initialize fields
The activity will also be restarted if a so called "configuration change" happens. A configuration change for example happens if the user changes the orientation of the device (vertical or horizontal). The activity is in this case restarted to enable the Android platform to load different resources for these configuration.
You can avoid a restart of your application for certain configuration changes via the configChanges attribute on your activity definition in your AndroidManifest.xml. The following activity will not be restarted in case of orientation changes or position of the physical keyboard (hidden / visible).

6. Context

The class android.content.Context provides the connections to the Android system. It is the interface to global information about the application environment. Context also provides access to Android Services, e.g. theLocation Service. As Activities and Services extend the class Context you can directly access the context via this.

Sunday, January 1, 2012

What is android?

This is my first post in my blog. Basically I suppose to post about android in my blog. First of all let us see 'what is android?'.


Android Operating System
Android is an operating system based on Linux with a Java programming interface. It provides tools, such as a compiler, debugger and a device emulator as well as its own Java Virtual machine (Dalvik Virtual Machine - DVM).
Android is officially guided by the Open Handset Alliance but in reality Google leads the project.
Android supports 2-D and 3-D graphics using the OpenGL libraries and supports data storage in a SQLite database.
Every Android applications runs in its own process and under its own user id which is generated automatically by the Android system during deployment. Therefore the application is isolated from other running applications and a misbehaving application cannot easily harm other Android applications.

Important Android components

An Android application consists out of the following parts:
  • Activity - represents the presentation layer of an Android application, e.g. a screen which the user sees. An Android application can have several activities and it can be switched between them during runtime of the application.
  • Views - the User interface of an Activities is built with widget classes which inherit fromandroid.view.View. The layout of the views is managed by android.view.ViewGroups. Views often have attributes which can be used to change their appearance and behavior.
  • Services - perform background tasks without providing an UI. They can notify the user via the notification framework in Android.
  • ContentProvider - provides data to applications, via a content provider your application can share data with other applications. Android contains a SQLite DB which can serve as data provider
  • Intents - are asynchronous messages which allow the application to request functionality from other services or activities. An application can call directly a service or activity (explicit intent) or ask the Android system for registered services and applications for an intent (implicit intents). For example the application could ask via an intent for a contact application. Applications register themselves to an intent via anIntentFilterIntents are a powerful concept as they allow the creation of loosely coupled applications.
  • BroadcastReceiver - receives system messages and implicit intents, can be used to react to changed conditions in the system. An application can register as a BroadcastReceiver for certain events and can be started if such an event occurs.
  • Widgets - interactive components primary used on the Android homescreen to display certain data and to allow the user to have quick access the the information
Other Android components are Live Folders and Android Live Wallpapers. Live Folders display data on the homescreen without launching the corresponding application.

Dalvik Virtual Machine

Android uses a special virtual machine, e.g. the Dalvik Virtual Machine. Dalvik uses special bytecode. Therefore you cannot run standard Java bytecode on Android. Android provides a tool dx which allows to convert Java Class files into dex (Dalvik Executable) files. Android applications are packed into an .apk (Android Package) file by the program aapt (Android Asset Packaging Tool) To simplify development Google provides the Android Development Tools (ADT) for Eclipse. The ADT performs automatically the conversion from class to dex files and creates the apk during deployment.

Security and permissions

Android defines certain permissions for certain tasks. For example if the application wants to access the Internet it must define in its configuration file that it would like to use the related permission. During the installation of an Android application the user receives a screen in which he needs to confirm the required permissions of the application.